Pendant Control Station vs Radio Remote Control: Which Fits?
Pendant control station or radio remote control? Compare cost, safety, operating range and maintenance, see which fits your working conditions, and plan a hybrid setup.
Read More
Learning how to pair a crane remote control is mostly preparation rather than procedure. On most industrial systems the pairing itself takes under two minutes; what fails is the setup around it — a weak transmitter battery, a receiver that never entered learn mode, or a pairing window that closed before the signal was sent. This guide covers what to check first, the three pairing methods, the step-by-step routine, and a table for diagnosing failed attempts.
Treat the sequence below as a framework rather than a script: how to pair crane remote control units is model-specific, so confirm the button names and timing against the label inside the receiver or the manual supplied with the unit.
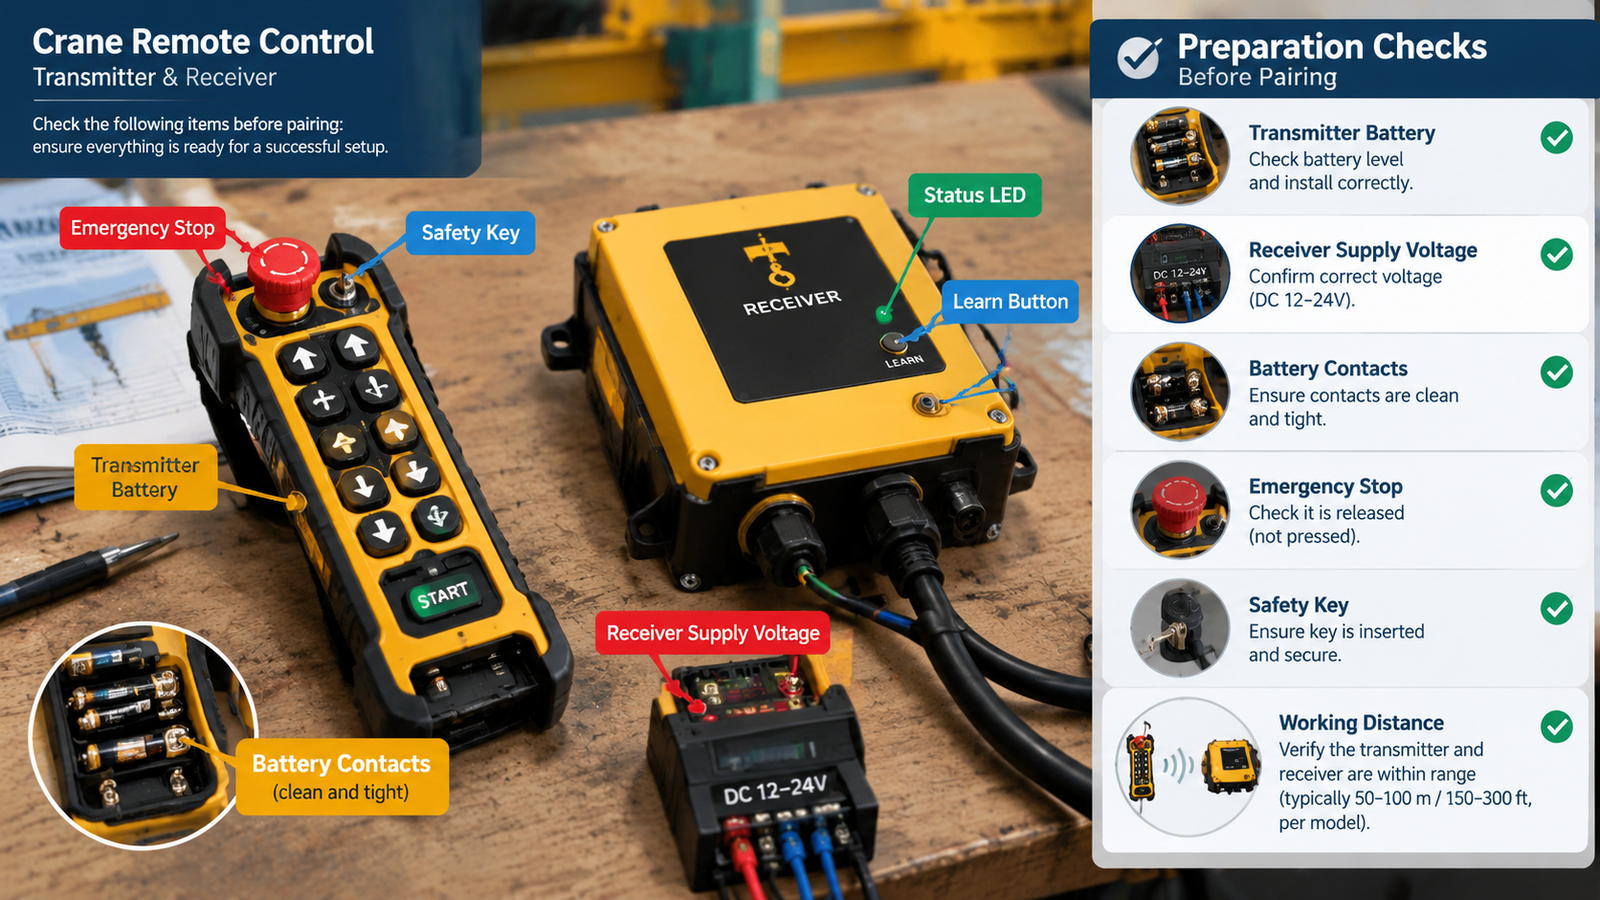
Most failed attempts are caused by conditions that have nothing to do with the pairing sequence. Each item below costs a minute and removes a whole category of false starts.
| What you see | What it usually means | What to do next |
|---|---|---|
| No LED at all | Receiver has no supply | Check the fuse or breaker and verify the supply voltage at the terminals |
| Power LED on, status idle | Receiver powered but not in pairing mode | Start the learn or pairing routine |
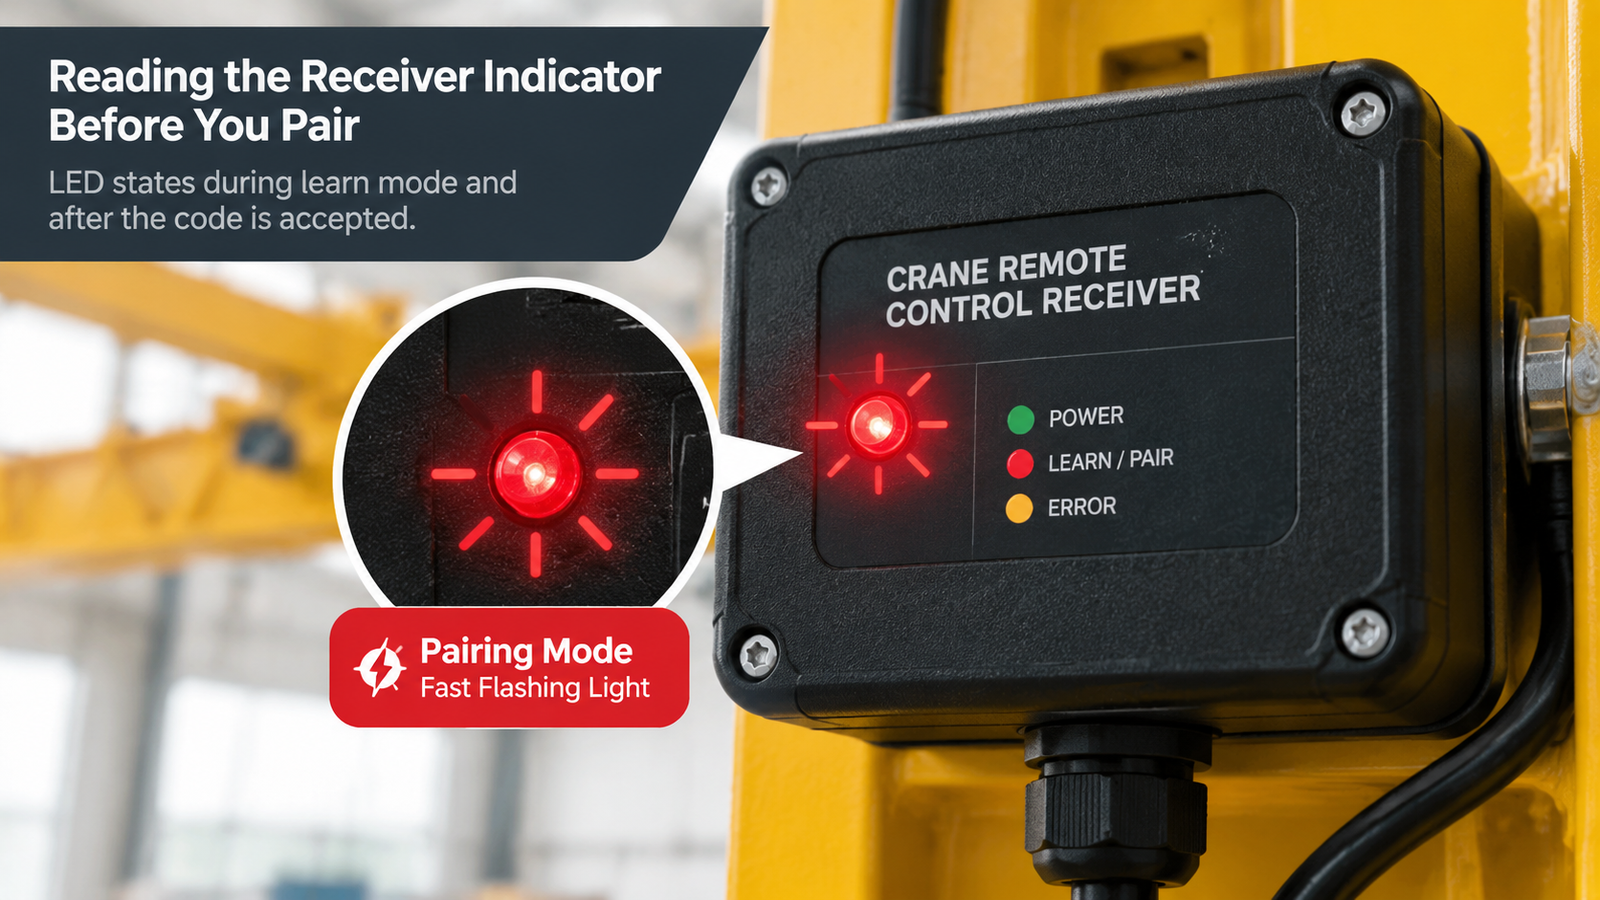
| Status LED flashing rapidly | Receiver is in pairing mode, waiting for a code | Send the pairing signal before the window closes |
| Status LED steady, or off then on | Code accepted and stored | Test every function before returning the crane to service |
| Slow or patterned flashing | Internal fault or lost radio link | Power-cycle and repeat; if it persists, stop and contact the supplier |
| Stop circuit latched | Emergency stop circuit is open | Release the stop and reset the circuit before pairing |
Nearly every system you will meet uses one of three approaches. Identifying which one you have determines whether crane remote control pairing is a two-minute task or a hardware job.
The receiver stores the transmitter code in memory. You put the receiver into learn mode, send a signal from the transmitter, and the code is written. This is the most common approach on current equipment, including the F24-12S/12D remote controller and the F24 series, which use learning code together with an emergency stop and a safety key switch, so a replacement transmitter can be commissioned on site without rewiring.
Both the transmitter and the receiver contain a switch array that must be set to an identical pattern. There is no pairing routine: you open both housings, match the switches and close them again. It is common on older or economy systems and is the least secure arrangement, because anyone who opens a matching unit can copy the code.
Some systems are matched at the factory and cannot be re-paired in the field. If either unit fails, the set is replaced together, and the labels normally show a serial relationship between the two.
Whichever method your system uses, the receiver supply voltage and the number of outputs are fixed when the system is ordered. Both are listed for every model in the industrial remote control range, which is worth checking before assuming a replacement will be a straight swap.
Confirm the button names and the timing window against your receiver documentation, and do the work with the crane unloaded.
| Symptom | Likely cause | Action |
|---|---|---|
| LED never starts flashing | Learn button not held long enough, or receiver not powered from the correct terminal | Hold for five to eight seconds and re-check the supply at the receiver |
| Flashes but never settles | Signal arrived after the window closed, or transmit power too low | Repeat and send the signal immediately, with fresh batteries |
| Pairs, then drops out within minutes | Battery voltage collapsing under load, or supply sag | Measure the battery while transmitting and the supply under load |
| Two cranes answer one handset | Two systems share a code or channel on one site | Re-pair one set only, and plan exclusive codes for each crane |
| Pairs but no motion | Stop circuit open, interlock or limit tripped, output fuse failed | Release the stop, check limits and interlocks, then check the output fuse |
| Works close up, fails at range | Antenna damaged or screened, or receiver mounted in a closed metal enclosure | Relocate the antenna and avoid enclosing the receiver in metal |
A pairing that lights up an LED is not a commissioned system. With the hook clear and the area below the load empty, confirm the following.
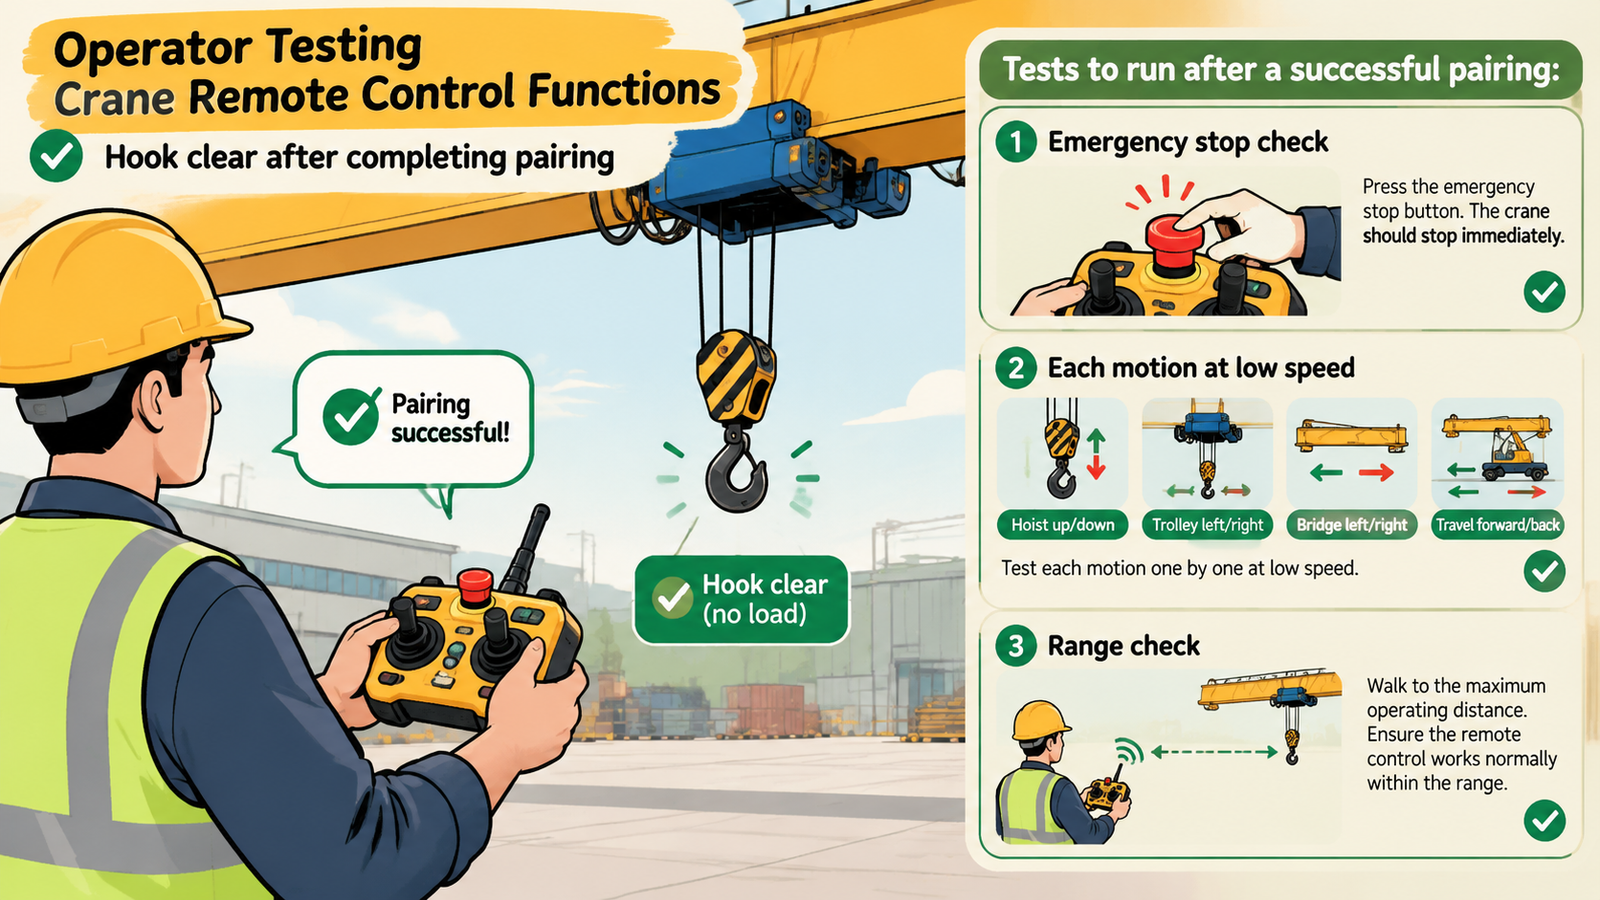
Pairing is also the moment to check that the transmitter output configuration still matches the machine: a handset with the wrong number of buttons or speed stages will not reproduce the machine’s motion set.
Failures that repeat after two clean attempts are rarely a pairing problem. Stop and escalate when you find water ingress or corrosion inside the transmitter, a damaged antenna, a burned relay output, or a receiver reporting a fault pattern while correctly powered. The same applies when several cranes share one building: channel planning across a site is a configuration exercise, not something to solve by trial and error.
Before you write off the equipment, gather the machine type, the receiver voltage, the button layout you need and the fault symptom. Our frequently asked questions page covers warranty, documentation and spare parts, and our engineers will confirm which configuration pairs with your machine if you send the details first.
On a learning-code system the routine takes under two minutes once the panel is open. Allow twenty to thirty minutes end to end, because isolating the crane and testing every function afterwards is the larger part of the job.
Generally no. Pairing depends on a shared coding scheme, so transmitters and receivers are matched within one brand and model family. Where an older model is discontinued, request a compatible replacement based on your receiver’s label rather than pairing across brands.
Codes are stored in non-volatile memory and normally survive a power cut. Repeated loss of pairing usually points to a supply problem, a failing battery, water ingress at the receiver, or radio interference making the link unreliable rather than unpaired.
Many systems store more than one transmitter code, which is useful for shift handover or a spare handset. Confirm the number of stored codes for your model before relying on it.
No. Replacing batteries does not erase the stored code. If the system stops responding after a battery change, check cell orientation and the battery contacts first, since both are far more common than a lost code.